Showing posts with label organization. Show all posts

July 29, 2019

Free Classroom Labels (for Target's Square Label Pockets)

When I first started teaching ten years ago, I spent LOTS of time LABELING!  Avery sticker labels were my best friend. Now, Target Dollar Spot has blessed teachers with many ways to label your classroom with their clear adhesive pockets.

My favorite size is the square 3.5 x 3.5 clear labels.  I now prefer these over the Avery options because they don´t leave behind the sticker residue or annoying, white remnants that shipping labels normally do when you peel them off.  This means if you need to re-position them, it´s not a big deal. After leaving my first school district, some of my former coworkers let me know that Room 30 still has touches of me with all MY labels still on the cabinets! (That's just PROOF at how much of a job it is to REMOVE shipping labels.)

FREE Classroom Label Tip #1: Name Tags (on chair backs)

Last year, we started leveling our students for math.  This meant, my homeroom class would switch to one of the two other grade level teachers if they weren't staying with me for accelerated math.  I knew I wanted to have name tags in an area that other students coming from different classrooms wouldn’t be distracted by or messing with. As a fix, I decided to place the square labels on the chair backs. Some of the labels did need to be replaced about midway through the year because the kids would pull out the labels when I wasn’t vigilantly monitoring or through just normal wear and tear of stacking chairs, but it was definitely less than how often I normally have replaced regular desk tags!

FREE Classroom Label Tip #2: Table Folders

One of the ways I organize unfinished work at tables is with poly plastic folders.  I would mainly use this for students to keep writing papers and/or science lab activities since students tend to be at different stages of completion.  This system greatly helped me to manage revising rough drafts over the weekend, and planning for writing during the upcoming week.  The left pocket had a shipping label which said, "still working..." and the right pocket's label was, "finished work."

Looking through my class´ writing progress this way helped me to check the status of the class and determine who wasn't ready for the publishing stage, and how to plan my lessons accordingly.  Each table, 1 through 6, would travel lightly in my tote bag - much nicer than 25 notebooks. This method also kept everything easily organized for students to access without having to pass back and sort through an entire class set.

FREE Classroom Label Tip #3: Personal Schedule Reminders

Managing schedules for my resource and speech students DRIVES me CRAZY!! I try to avoid having to answer the questions, "When do I have to leave for writing?" as much as possible.  Part of making this a peaceful reality for myself is to create schedule reminders for my students to refer to all by themselves!  For example, "What time do we go to lunch?" - I simply point to the schedule on the whiteboard.  Why wouldn't it be different for personal schedules?  

Aside from not having a clue what time each speech student leaves for their services every week, I know these printed reminders help out these guys deal with their anxiety so much!! These students crave routines and are SO TIME-DRIVEN!!  So, I designed a desk reminder that can be easily edited the next time there's a schedule change ------which is HIGHLY LIKELY (at my school)!!

I place this reminder in the top corner of my students' desks because they are discrete and help them to manage all the places they need to be ALL by THEMSELVES!! This promotes independence and saves my sanity because I no longer have to worry about getting these learners to their push-out classrooms.

Since this is my FAVORITE way to use these Target labels, I created this video tutorial to show you how to do it yourself! Check it out to see how I create these personal schedule reminders!

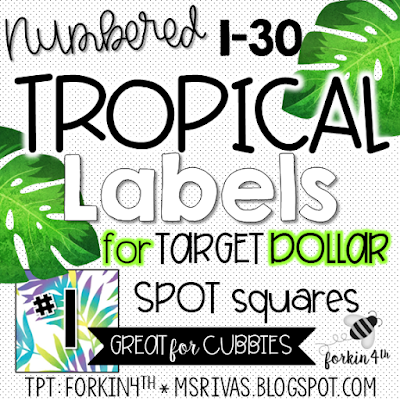
FREE Classroom Label Tip #4: Numbered Cubby Labels

Instead of placing the labels where the printout loads in at the top, I rotate the opening so it´s on the right.  Not only did it help me to keep everything flush with the straight edge, but it has helped these labels stick for years! This strategy prevented the adhesive pocket from getting caught on anyone´s backpack and allowed me to avoid the lip that is created by the opening gap.  I´ve had these labels on my cubbies for the past two years without having to replace a single one!!

FREE Classroom Label Tip #5: Participation Tallies

WARNING: This will make the label somewhat dirty.  Simply, place a Sticky Note inside the label and have students write on them with dry erase markers.  During math lessons I do ANYTHING possible to make sure students are engaged in their learning. One of these strategies is to have them give themselves a participation tally for responding or completing the appropriate task when directed.  I typically set a goal of having them reach 15 tallies before our Exit Ticket at the end of our lesson.

For example, I might say, "If you read the I can statement with me, give yourself a tally." "If this is the solution you shared with your partner, give yourself a tally."   If you´d like to make it even more competitive, then you can have table groups total up their tallies and award an ACTUAL TABLE POINT to the table with the most participation tallies that day.

BONUS Tip: Line Display (no pocket label needed)

My sister has previously used calendar numbers purchased at the teaching supply store to attach to the tiles on the floor in her kindergarten classroom.  Now, her students use these numbers to know what spot to stand in when they line up to leave the classroom at any time. This teaches them about personal space and where to find their student number.

EXCLUSIVE FREEBIE for my blog followers (simply click the image above or below)


June 5, 2019

5 Ways to Save Your Teacher Sanity at the End of the School Year

We've all been there... the dreaded end of the year when it seems there's not enough time in the day and everyone is just ready to start SUMMER BREAK!  Keep reading to learn how I help save my sanity at the end of the year.
#1 - Decide What You're Doing for End of Year Student Souvenirs
First off, you're going to have to answer a lot of questions which I know can be difficult for us sometimes.
  • Are you going to make a class memory book?  (will these need to be comb bound or will these be digital?) 
  • Will you devote time to making a class memory movie where you upload photos and videos you've taken throughout the year and add in songs?  
  • Will you be giving your students a small souvenir/gift from you to take home?  [Will you be creating those personalized name water bottles that appear all over Pinterest, or are you stuffing a party favor bag with personal items (clip from the clip chart, stick from the pull jar, photo, etc.) and maybe something inexpensive like an Otter Pop or bubbles.]  
Whatever it is you plan on doing, my biggest advice is not to wait until the day before to PLAN IT OUT.  Set the plan about a month in advance so you can buy whatever supplies you'll need from Amazon, Target, or the Dollar Tree accordingly.

Also, don't feel OBLIGATED to give anything.  You've already given them A YEAR'S WORTH of LOVE, LEARNING and, not to mention, the BEST instructional powers you had each school day!  Don't compare yourself to what your colleagues may be doing or what's trending on social media at the time.  Give what YOU feel comfortable giving, and what's REALISTIC for you to accomplish given your personal commitments which are often busy with barbeques, Cinco de Mayo parties, Mother's Day celebrations, graduations, and #REPORTCARDS!!!

Personally, I feel that the biggest thing your students will take away are THE MEMORIES they forged while with you in your classroom.  So, I focus my attention on making an impactful class movie, complete with quotes, fun songs we've enjoyed during the year, and videos of some of our special days.  Then, we create new memories with our Class Talent Show and Last Day Science Lab: the beloved Mentos Soda Geyser experiment!

#2 - Get Grades Done First
I can't STRESS this enough!  In order to BE READY to hand out student report cards on the last day of school, you have to have your grading done.  If you are an upper grade teacher and haven't discovered the trick to saving your time grading yet, get your students to HELP!  Obviously they must be trained, "Put your pencils away and hold your grading pen/marker in the sky.  If you're caught using pencil to change your original answer, you just earned a ZERO on the assignment."  I've found when students self-grade they pay attention more to what the correct answer was and you won't repeat yourself as much - but that's when the cheating becomes tempting for some.  If you do a trade & grade approach where the grader writes checked by and their name at the bottom of the page, the temptation to cheat is gone, but sometimes you'll have lazy graders who don't pay as close attention.

To make this in-class grading session even more helpful, make sure you collect the work in alphabetical order (most grading systems are already setup this way).  If it's easier just to collect work by table group, then you can have a teacher helper sort the papers into alphabetical order for you before you touch the stack.  This will make entering the grades super efficient.  My mantra is, the sooner my grades are done, then the sooner I can print out report cards to stuff in the envelopes.  This also will RELIEVE a lot of the pressure the last month of school brings!

#3 - Keep Students Engaged with MORE Independent Activities
Take a breath, relax and let go of some of the control that comes along with teacher-directed instruction.  Let's be real, end of year checkout requires a lot of gathering - signatures, files backed up, materials accounted for, etc.  Nobody has time to get everything done during your teacher prep time alone.  This is why it's important to get your students working on activities that are meaningful, yet simple enough for them to be successful completing it alone.  Don't just have ONE activity in mind, I always write a prioritized list of 3 activities for them to complete within a certain time before I will address them whole group again.

So you might be thinking, how do you prevent your students from avoiding the assignment or rushing to finish the activity?  Be straight-up when you give the directions.
  1. Set Clear Expectations - tell your class that you expect QUALITY WORK.  Review what these are so there's no confusion.  If it involves coloring - review what you will & will not allow.  Also, have students share out how to make sure their writing can still be CLEARLY read by making smart illustrating choices.  
  2. Make Them Motivated - require the completion of the assignment in order for the student to participate in X, Y or Z.  For example, I'd often remind, "If this isn't completed or done to the best of your abilities by the time we leave for Wednesday's special, then you won't be able to participate in our Mentos Soda experiment on the last day." 
  3. Encourage Students to Self Problem Solve - if your class thought you were just kidding about not being available to ask for help during the activity, then they will test you.  Make it clear that you're not available.  "Sorry, I can't help you on drawing a picture of that - this is YOUR work, try YOUR best!" or "Who else might be able to help you with that?" or "What resource could YOU use to help you with spelling that?" The trick is not to give in, once they see you give in to another classmate's request for help, they'll never leave you alone to get done what you need to accomplish off your end of year checkout list.
What are some examples of these activities?
It can be as simple as reading independently, or making a Thank You card for a parent volunteer.  I often have my students complete a memory page for their classmates to help me with creating my Memory Movie first because that process always takes me a few days.  Basically, each student uses a lined sheet of paper and numbers from 0 to however many students are in the class (skipping lines and using both sides).  Next to each number, they write a thoughtful memory of what they'll always remember about that person.  #0 is saved for their memory of the teacher.  All the teacher needs to do is display a numbered class list for students to reference.  When they get to their name, the student gets to choose a hashtag they'd like to represent them.  A few years back when mustaches were all the rage, the girl who wore a mustache necklace everyday wrote a fitting hashtag for herself #MUSTACHEgirl.  Or it could be as simple as #DallasCowboysRULE or #TACOSareAWESOME  --- you get the idea!  

Since that activity can be completed in about 10-15 minutes, I need students to work on something more substantial like these End of Year Student Advice Brochures.  Since the work and effort involved is far greater, it usually takes us a couple of days to complete these.  Start off by telling them the WHY behind this activity.  Kids trust other kids with giving them the truth, and since they are now experts on how to survive this grade level, then who is better to give the new students entering the grade level in the fall this helpful advice?  Not to mention, these student advice brochures are great for your new class to read during a CAROUSEL activity on the first day of school.  It helps to break the ice because they will find out some of the topics they get to learn about this school year and discover some fun facts about their new teacher!  To make planning this activity easier, check out my time-saving resource by clicking any of the images below.
 End of Year Advice Brochures

 End of Year Student Advice Brochures

 End of Year Student Advice Brochures

 End of Year Student Advice Brochures


#4 - Schoolwide Enrichment Days
After the high-stakes testing window has come and gone, the students can develop a slight dose of senioritis.  Luckily, at my school, we hold an End of Year "SCHOOL NAME College" where students get to sign up for "fun" elective type classes to keep them going during the last few days!  It is something they always look forward to, even though it only lasts 3 days.  Some examples of classes offered are Kahoot Trivia Challenge, Coding, Intro to Lacrosse, Random Acts of Kindness and DIY Dog Toys. I've taught Lyrical (singing & dancing along to school appropriate lyrics) and Spanish.  I really loved it because it allows us to stray away from the academic standards, and just focus on FUN and share our personal interests with the school!  Although I taught Spanish basics like the alphabet and common phrases, we also made cultural crafts like a Flamenco fan and Mexican tissue paper flowers.  Everyone puts their own spin on it, and it just makes school a happy place to be during the last week (if only it was a cure for ALL the meltdowns!)

#5 - Get Your Room Clean While Your Students Can Help You!
Once you've graded everything, you're going to have tests & other important papers to send home.  Get those sent home with students as soon as possible.  The only things that you want to pack into the report card envelope is the student's actual report card, and maybe a printout of their End of Year DIBELS benchmark scores or similar progress measures.

Four days before the last day of school, I have students start cleaning out their desks and take home all non-essential supplies.  This also helps to get rid of the extra clutter your students like to bring in - you know those poof balls & squishy stress relief critters?

After most of your students stuff has been cleared out, it's time to focus on organizing the classroom. Think about what projects you have wanted to organize but didn't quite get to this school year.  Enlist your student helpers to help you out.  Basically, all students LOVE to help you with whatever the task may be.  I've had the whole class working on specific projects simultaneously and it was such a TIMESAVER.  Using the Magic Eraser to scrub the student whiteboards, sorting through the class set of Crayola markers & tossing any with faded ink, labeling my class set of clipboards, stamping new class library books, organizing & cleaning math centers.  Bust out those Clorox wipes and clean away all the dust!  Although it will turn into a temporary tornado during the productivity phase, once everything gets done you will have SO MUCH checked off your list and your room will look spic and span!

This is also a good time to remind yourself to clear the paper clutter out of your room!  Recycle what didn't get used, toss out those things that are broken and random parts to supplies you've collected on your desk, and create a donation box for the baskets/toys/items you didn't need/use this past school year.  A tidy room is a calmer room!


July 9, 2018

Teachers LOVE the TARGET Dollar Spot!

Let's be REAL, aren't all teachers like this?  Or is it a generational thing?  Come to think of it, I think it might be more of a millennial (post 1980s), generational thing.  Either way, I'm a victim of being drawn like a moth to a flame to this galaxy of adorable notepads and $1 buckets.  Following the #targetteachers string on Instagram makes my problem even worse because now I'm driven to find all these things I MUST HAVE for my CLASSROOM this new school year!  The first item on my shopping list is practical, I actually need them for labeling things --- so if you come across those square adhesive labels in the Target Dollar Spot in Phoenix, lemme know!
Last year, I put these lovely square labels to good use as I finally updated my cubbies with fresh labels.  They were an after thought, remnants of the previous teacher who had the classroom.  Five years after moving in, I FINALLY got around to the updates you can see below!

After adding two new styles, I decided to make this resource available to other teachers online.  If you'd like to add this resource to your classroom, click any of the images below.  These STICK REALLY WELL because after a full year of use of pushing & shoving overstuffed backpacks, there was never an incident when one had fallen off, at all!  Now, it's time for me to STOCK UP!


P.S. If you don't hear from me for a while, it's because I'm at Target, getting more things for my classroom (of, course)!

July 8, 2018

Tropical Vibes (EDITABLE labels & name tags)


 Tropical & Stripes EDITABLE labels

Getting ready for the new school year, means it's time to get "OUT WITH THE OLD AND IN WITH THE NEW!"  I hope you enjoy adding this product to your classroom as much as I have and most definitely this will bring GOOD VIBES only as you decorate with tropical flair when you go BACK-to-SCHOOL this year!
 In previous school years, I've been content with my black & white polka dot name tags to achieve a streamlined look that did not VISUALLY ASSAULT my eyes all day long as I taught... *ahem* CHEVRON & LOUD COLORS such as RED which are not used in high doses in my room.  It seemed that this year as I am switching out DESKS for TABLES, that I'll also be switching POLKA DOTS out for STRIPES!
 This resource is an editable PowerPoint file so you're able to insert your student names or desired text into the textbox fields.  Another benefit of working with an editable file, is that you're able to duplicate a slide so you don't have to repeat your formatting over and over again for a FULL CLASS set!  Are you a fan of the font shown in the example nametags above?  If so, you can be like me and use the font, CCQuitBaconMyHeart which is an adorable Cara Carroll font available here.

 Have you ever seen those adhesive square pocket labels in the Target Dollar Spot before?  Well, let me tell you that these trendy, little bilingual name tags will fit perfectly inside of them.  I like them because they are durable and will last all year long on student desks, cubbies, bins, etc. but also do not require that you laminate the item that goes inside.  The sleeve protects whatever you're sliding in or out!
All of the name tags in this set come in 6 different color varieties, which makes it super SIMPLE to form groups.  For example, tell your students, "Go form a group made up of those who share the same color nametag as you."  In a class of 24 students, you can easily put them into mixed groups of 4.  Or, "This time you're group will need to be made up of ALL DIFFERENT colored name tags."  If you have students already sitting in tables with different colored name tags, then randomly assign various tasks, "All purple nametags come collect the materials for your team."  "Black nametags will stand to be the spokesperson for their team," the possibilities are endless.  You can also add an image or colored dot/shape of your choice in the editable PowerPoint file to each name tag so you can easily incorporate more cooperative learning strategies into your classroom!
Finally, before you open your doors to new students this school year, protect your personalized labels by laminating anything that comes across heavy traffic or daily use.  For example, all of my table baskets and bins are labeled by the table number they've been assigned.  These community supplies get frequently used and get cleaned by Clorox wipes from time to time, so they must be built to last the school year. Check out this BRAND NEW, HEAVY-DUTY HeatSeal PRO Laminator from Mead I used to protect my tropical labels!  Read more about my review of this product's overall quality in my previous post.